Image optimization for SEO is the process of formatting, compressing, and labeling images so search engines can discover and rank them, while maintaining fast page load speeds that improve both rankings and user experience. Every image on your site is an opportunity to rank in Google Images, appear in image packs, or surface in Google Lens. Handled poorly, they slow pages and cost rankings.
What image SEO covers:
- Choosing the right file format (JPEG, PNG, WebP, AVIF, SVG)
- Writing descriptive file names and alt text
- Compressing and resizing images to reduce file size
- Implementing responsive images with srcset
- Adding images to your XML sitemap
- Using structured data to enable rich image results
- Optimizing Open Graph tags for social sharing
- Serving images via a CDN for faster delivery
- Improving Core Web Vitals scores (LCP and CLS)
Done right, image SEO drives organic traffic from multiple surfaces beyond the main search results page.
Most SEO guides focus on text: keywords, headings, internal links, and meta descriptions. Images are frequently treated as decoration rather than as SEO assets. This leaves traffic on the table. A properly optimized image can rank in Google Images, appear as the featured image in an image pack in the main SERP, load faster (which improves rankings and reduces bounce rate), and surface in Google Lens for visual queries that never involve text search at all.
This guide covers every major image SEO technique with implementation details. The goal is not a checklist to skim but a working reference you apply to every new page and revisit quarterly for site-wide audits.
Why Image SEO Matters for Rankings and Performance
Image SEO has a direct impact on both search visibility and page performance. The returns are concrete.
Images as an Organic Traffic Channel
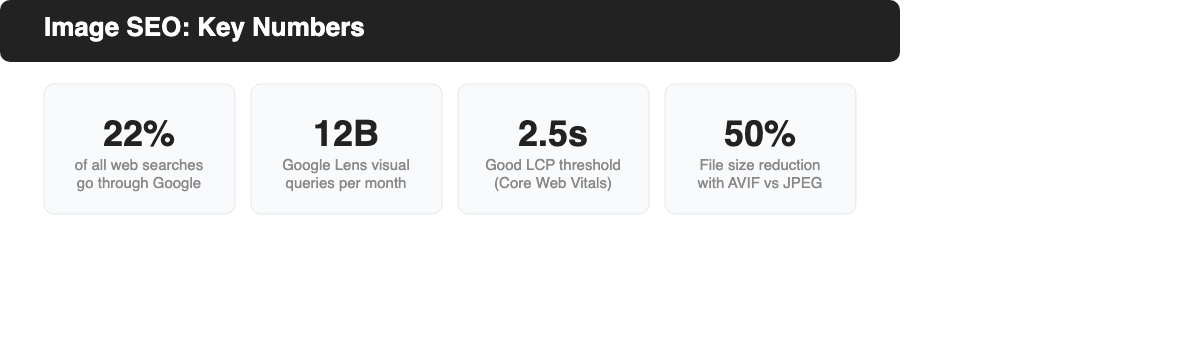
Google Images is one of the largest search engines in the world. It accounts for about 22 percent of all web searches: a massive channel most sites underinvest in. Beyond traditional image search, images appear in a range of SERP features:
- Image packs embedded in regular search results
- Knowledge panels with brand or product images
- Google Shopping and product carousels
- Google Lens results triggered by visual queries
- Discover feed image cards
Each of these placements is a separate traffic source. A single optimized image on a well-optimized page can pull traffic through multiple channels simultaneously.
Google Lens now processes over 12 billion visual search queries per month. Users photograph products, landmarks, plants, and text, then ask Google to identify them. Appearing in Lens results is a growing opportunity for ecommerce, travel, food, and home decor content.
The Core Web Vitals Connection
Images are the Largest Contentful Paint (LCP) element on most pages. LCP measures how long it takes for the largest visible element to render. Google uses LCP as a ranking signal through Core Web Vitals.
- Good LCP: under 2.5 seconds
- Needs improvement: 2.5 to 4.0 seconds
- Poor: over 4.0 seconds
When your hero image or above-the-fold image is unoptimized, it directly delays LCP and pushes your page into the “needs improvement” or “poor” range. A single image optimization decision. Switching to WebP, adding a preload hint, or resizing to actual display dimensions can move your LCP score from poor to good.
Images also affect Cumulative Layout Shift (CLS), which measures visual stability. When images load without specified dimensions, the browser does not know how much space to reserve. As the image loads, the layout shifts and pushes text and buttons out of position. Good CLS is under 0.1. Specifying width and height attributes for every image prevents layout shifts and improves CLS automatically.
Accessibility and UX Benefits
Alt text is required for accessibility under WCAG guidelines published by the W3C Web Accessibility Initiative (w3.org). Screen readers used by visually impaired users read alt text aloud to describe images. Writing good alt text benefits your rankings directly: Google states that it uses alt text “along with computer vision algorithms and the contents of the page to understand the subject matter of the image.”
Accessibility and SEO alignment is not accidental. Describing what an image actually shows, not keyword stuffing, is what both screen readers and Google need.
From a UX perspective, fast-loading images reduce bounce rate and increase time on page, both behavioral signals that correlate with rankings. Sites where images load in under 2 seconds see measurably lower abandonment rates than sites where images take 4-5 seconds. This effect is especially pronounced on mobile, where users are on slower connections and more likely to leave slow pages.
Captions also play a UX role. Research from the Poynter Institute found that captions are among the most-read text on any webpage, ahead of headlines and body copy. Descriptive captions that add context to what the image shows, rather than restating the article title, provide value to readers and additional context to Google.
Image Formats for SEO: JPEG, PNG, WebP, AVIF, and SVG Compared
Choosing the wrong image format wastes bandwidth, slows page load, and costs ranking. The right format depends on the image type and what you need to balance between quality and file size.
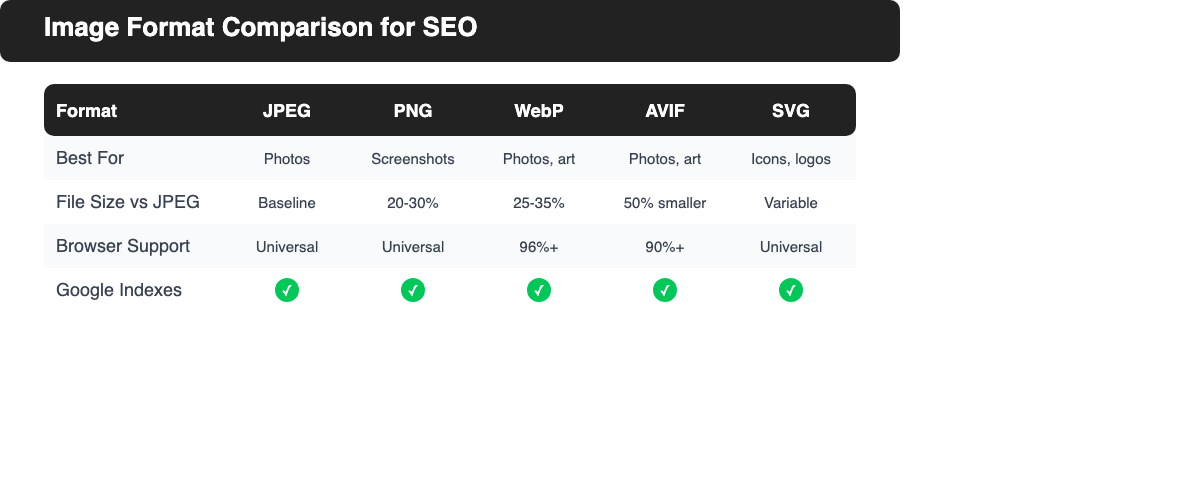
| Format | Best For | File Size vs JPEG | Browser Support | Google Index |
|---|---|---|---|---|
| JPEG | Photos, complex images | Baseline | Universal | Yes |
| PNG | Screenshots, transparency | 20-30% larger | Universal | Yes |
| WebP | Photos, illustrations | 25-35% smaller | 96%+ | Yes |
| AVIF | Photos, illustrations | Up to 50% smaller | 90%+ | Yes |
| SVG | Icons, logos, simple graphics | Variable | Universal | Yes |
| GIF | Animated images only | Often very large | Universal | Yes |
IMPORTANT: CSS background images set via the background-image CSS property are not indexed by Google. Google’s documentation explicitly states that HTML img elements must be used for images you want to appear in search. Never use CSS background images for content images you want indexed.
JPEG
JPEG is the baseline format for photographs and complex images. It uses lossy compression, which means some image data is discarded to reduce file size. A quality setting of 75-85 is the standard target: below that, visible compression artifacts appear; above that, file sizes increase significantly with little visible benefit.
JPEG is universally supported and the safe default when you are not using modern formats. Its main limitation is the lack of transparency support. Use PNG or WebP for images that need transparent backgrounds.
PNG
PNG uses lossless compression, preserving every pixel exactly. This makes it ideal for screenshots, UI mockups, logos with sharp edges, and images with transparency. The trade-off is larger file sizes: PNG files are typically 20-30% larger than JPEG equivalents for the same photographic content.
Use PNG for images where quality cannot be compromised, particularly screenshots and images with text overlaid. For photographs, switch to WebP or JPEG instead.
WebP
WebP is the recommended default for most web images. Developed by Google, it delivers 25-35% smaller file sizes than JPEG at comparable visual quality for photographs, and even better compression for graphics. It supports both lossy and lossless compression, and handles transparency.
Browser support for WebP is now over 96%. For the small share of browsers without native support, use the picture element with a WebP source and a JPEG fallback:
<picture>
  <source srcset="image.webp" type="image/webp">
  <img src="image.jpg" alt="Descriptive alt text here" width="800" height="600">
</picture>
AVIF
AVIF is the next-generation image format built on the AV1 video codec. It achieves up to 50% smaller file sizes than JPEG at comparable quality, outperforming even WebP in most cases. Google officially supports AVIF in Google Search alongside JPEG, PNG, WebP, SVG, BMP, and GIF.
Browser support for AVIF has crossed 90% and is growing. For maximum compatibility, serve AVIF with a WebP and JPEG fallback using the picture element.
AVIF is the best choice for new sites and high-traffic pages where image load performance is critical. For sites with mixed browser audiences, use AVIF with WebP fallback.
SVG
SVG (Scalable Vector Graphics) is the best choice for logos, icons, and simple illustrations. SVG files contain mathematical descriptions of shapes rather than pixel data, so they scale to any size without quality loss. They are often dramatically smaller than raster versions of the same graphic.
For complex illustrations with many paths, SVG files can become large. Use raster formats (WebP or PNG) for complex illustrations with gradients and photographic detail.
How to Optimize Images for SEO: 12 Best Practices
Optimizing images for SEO involves a set of technical and content decisions that work together. Apply all 12 consistently for the best results.
1. Use Descriptive, Keyword-Rich File Names
File names are one of the signals Google uses to understand what an image shows. Google’s documentation explicitly states: “Google uses the filename as a clue to the subject matter of the image.” Before uploading, rename every image file with a descriptive name that reflects the content. Use hyphens to separate words, not underscores or spaces.
Good file names:
- blue-running-shoes-nike-air-max.jpg (describes what is in the photo)
- screenshot-google-search-console-coverage-report.png (describes the screenshot)
- how-to-optimize-images-for-seo-checklist.webp (describes the infographic)
Poor file names:
- IMG_4893.jpg (camera default name: tells Google nothing)
- photo1.jpg or image.jpg (generic, zero signal value)
- bluerunningshoesnike.jpg (no hyphens between words)
Include the primary keyword where it is naturally accurate, but do not stuff multiple keywords into the file name. If you have multiple images on the same page, give each a unique descriptive name. Duplicate names across different images on the same site can cause confusion about which URL to associate with which image.
For localized pages, Google recommends translating file names to match the page language. An English page about blue running shoes and a German page about the same product should use different, language-appropriate file names. This helps Google serve the right image for the right locale.
One practical workflow: rename images before uploading them to your CMS. WordPress, for example, sets the URL from the file name at upload time. Renaming after upload requires permalink changes and can break existing references.
2. Write Effective Alt Text
Alt text (the alt attribute on an img element) is the single most important SEO signal for individual images. Google uses alt text along with computer vision algorithms and the surrounding page context to understand what an image depicts and which search queries it should match.
The W3C Web Accessibility Initiative (W3.org) provides the clearest guidance on writing effective alt text: describe the image as you would to someone who cannot see it. The key is to describe the actual content, not the desired keyword.
Alt text best practices:
- Be descriptive: describe what the image actually shows
- Keep it concise: the recommended maximum is 125 characters, which is the limit many screen readers use before truncating
- Include the primary keyword naturally where it fits the image, but never force it
- Do not begin with “Image of…” or “Picture of…” because screen readers already announce that an image is being described
- For purely decorative images (dividers, background textures), use empty alt text (alt=””) so screen readers skip them without announcing “image”
- Avoid keyword stuffing in alt text. Google treats keyword stuffing in alt text as a spam signal
Comparing alt text quality:
Strong: alt=”screenshot showing Google Search Console Coverage report with 3 URLs excluded by robots.txt” Weak: alt=”image optimization SEO tutorial image SEO best practices” Also weak: alt=”image” or alt=”” on a meaningful content image
For images containing text (infographics, screenshots with labels, charts), the alt text should include the text shown in the image, since Google’s computer vision reads visible text in images but alt text is more reliable.
For SVG elements, use a title element with a unique ID inside the SVG instead of alt text. Place a title element as the first child of the SVG element and reference it with aria-labelledby for full accessibility compliance.
3. Resize Images to Their Display Size
Do not upload a 4000x3000px photograph if it displays at 800x600px on your page. The browser downloads the full-resolution file regardless of the display size, then scales it down visually via CSS. This wastes bandwidth and directly slows LCP. The browser downloads 3-4x more data than it needs.
How to determine the right dimensions:
- Check the CSS or design spec for the maximum display width of the image container
- Multiply by 2 for retina/HiDPI displays (a 800px container needs a 1600px image source)
- Resize the image to those exact dimensions before export
For a standard blog post where images display at 800px wide: export images at 1600px wide for retina, compress them, and let CSS handle display scaling with max-width: 100%.
For responsive layouts where the image displays at different sizes on different screens (full-width on mobile, half-width on desktop), use srcset rather than a single resized file. See Step 6 for the srcset implementation.
Tools for resizing:
- Squoosh (browser-based, free): drag, drop, choose dimensions and compare quality
- ImageMagick or Sharp (command-line/Node.js): batch resizing for large image libraries
- ImageOptim (Mac): lossless optimization after resizing
- WordPress image settings: set maximum dimensions to match your content width
One often-overlooked issue: featured images and og:image files. Many CMS themes display featured images at full width on archive pages and at a narrower width inside articles. Export a version sized for the widest display use case (typically 1200px+) and let the CMS handle intermediate sizes.
4. Compress Images Without Sacrificing Quality
Image compression reduces file size without changing display dimensions. The goal is the smallest file size where compression artifacts are not visible at normal viewing distance and the image looks clean to the human eye.
Compression type matters:
- Lossy compression (JPEG, WebP lossy, AVIF): removes pixel data that is visually imperceptible at normal viewing size. The “quality” setting controls the trade-off. For JPEG, quality 75-85 is the industry standard target; below 75, compression artifacts become visible on sharp edges and text; above 85, file size increases with little visible improvement.
- Lossless compression (PNG, WebP lossless): preserves every pixel exactly. Useful for screenshots, icons, and images where absolute fidelity is required. Lossless PNG files can still be reduced through palette optimization tools like pngquant or PNGCrush, which reduce color depth without visible change.
Compression targets by use case:
- Standard content images (in-article photos, product images): aim for under 100 KB per image
- Hero images and above-the-fold images: aim for under 200 KB (lower is better for LCP)
- Thumbnails and grid images: aim for under 30-40 KB
- Icon sets served as individual files: aim for under 10 KB (or use SVG instead)
Compression quality reference:
| Format | Quality Setting | Use Case |
|---|---|---|
| JPEG lossy | 75-85 | Photos, standard content images |
| WebP lossy | 75-85 | Photos, illustrations, modern default |
| AVIF | 60-80 (AVIF scale differs) | High-performance images |
| PNG lossless | lossless + pngquant | Screenshots, transparency |
Recommended tools for image compression:
- Squoosh (squoosh.app): browser-based, free, side-by-side quality comparison
- TinyPNG or TinyJPEG (tinypng.com): simple drag-and-drop batch compression
- ImageOptim (Mac): lossless optimization applied locally
- ShortPixel or Imagify: WordPress plugins that auto-compress on upload
- Cloudflare Images or Cloudinary: CDN-integrated compression and format conversion
For JPEG, the sweet spot is a quality setting that keeps the image visually clean while staying under your target file size. Use the quality comparison slider in Squoosh to verify before exporting. Zoom in on fine detail areas (hair, fabric, text) to check for artifacts.
5. Choose the Right Image Format
See the Image Formats section above. The short rule:
- Photographs: WebP (primary), JPEG (fallback)
- Screenshots and UI: PNG or WebP
- Logos and icons: SVG
- Emerging default: AVIF with WebP fallback
Avoid serving JPEG for images that were originally PNG screenshots. Lossy compression adds visible artifacts to sharp edges and text. Avoid serving PNG for photographs. File sizes end up unnecessarily large.
6. Use Responsive Images with srcset and sizes
Responsive images ensure users on mobile devices download appropriately sized images rather than desktop-sized files scaled down via CSS. This reduces bandwidth use and speeds up load time on mobile.
The srcset attribute specifies multiple image versions at different resolutions:
<img
  src="image-800w.jpg"
  srcset="image-400w.jpg 400w, image-800w.jpg 800w, image-1200w.jpg 1200w"
  sizes="(max-width: 600px) 400px, (max-width: 900px) 800px, 1200px"
  alt="Descriptive alt text"
  width="800"
  height="600"
>
The browser selects the most appropriate source based on the device’s viewport and pixel density. For Google Discover and social sharing, serve images at minimum 1200px wide so they qualify for large image previews.
Always include a src fallback attribute alongside srcset. This is required by the HTML specification and ensures older browsers get a working image source.
7. Implement Lazy Loading
Lazy loading defers the loading of off-screen images until the user scrolls near them. This reduces the amount of data downloaded on initial page load, improving both load speed and LCP for the visible viewport.
Modern browsers support native lazy loading via the loading attribute:
<img src="image.jpg" alt="Description" loading="lazy" width="800" height="600">Do not apply lazy loading to the hero image or any image visible in the initial viewport. This delays the LCP element and worsens Core Web Vitals. Apply loading=”lazy” only to images below the fold.
For the primary LCP image (typically the hero image), use fetchpriority=”high” to signal to the browser that it should be loaded as a high-priority resource:
<img src="hero.webp" alt="Hero image description" fetchpriority="high" width="1200" height="630">8. Add Images to Your XML Sitemap
Image sitemaps help Google discover images that might otherwise be missed, particularly images loaded via JavaScript or images on pages that are not frequently crawled. Submitting an image sitemap is especially valuable for image-heavy sites like photography portfolios, ecommerce stores, and news sites.
You can add image tags to your existing XML sitemap using the Google image sitemap namespace:
<url>
  <loc>https://example.com/page/</loc>
  <image:image>
    <image:loc>https://example.com/images/photo.jpg</image:loc>
    <image:title>Descriptive image title</image:title>
    <image:caption>Optional caption text</image:caption>
  </image:image>
</url>
Note: unlike regular sitemaps, you can include image URLs from other domains (such as a CDN) in image:loc elements. If you do, verify ownership of the CDN domain in Google Search Console.
Most SEO plugins (Yoast, Rank Math) generate image sitemaps automatically. Submit your sitemap to Google Search Console under Sitemaps.
9. Add Structured Data for Images
Structured data helps Google understand what an image represents and enables rich results in Google Search. The ImageObject schema type at schema.org is the foundation for image structured data.
Structured data uses JSON-LD format in a script tag in the page head. The most common implementations for images:
For articles and blog posts, use the primaryImageOfPage property to specify which image Google should treat as the main image for this page. This helps Google choose the right image for image pack placements and Knowledge Panels:
- Specify the image URL, width, and height in the schema
- Use the same image URL as your og:image tag for consistency
For product pages, use Product schema with the image property listing all relevant product images. Accurate product structured data with images, prices, and availability directly enables product carousels, shopping results, and Google Lens product recognition.
For recipe pages, use Recipe schema with image properties. Recipe images are required to appear in Google Image Search’s recipe filter.
Google reads both JSON-LD structured data and HTML meta tags. If you cannot implement full JSON-LD, at minimum specify the primaryImageOfPage using og:image. Google recognizes og:image as a preferred image signal.
Use Google’s Rich Results Test (search.google.com/test/rich-results) to validate your structured data after implementation.
10. Optimize Open Graph Image Tags
Open Graph meta tags control the image that appears when your page is shared on social media platforms and messaging apps. They also influence how Google displays your page in some contexts.
OG image guidelines:
- Minimum size: 1200×630 pixels (recommended by most platforms)
- Avoid extreme aspect ratios. A wide rectangle between 1.9:1 and 1:1 works across platforms
- Do not use generic images (logos only) for article og:image tags
- Use an image that directly represents the content of the page
- Include og:image:width and og:image:height meta tags alongside og:image
The og:image tag is one of the first things social platforms read when a URL is shared. Pages without a correctly sized og:image appear without an image preview, significantly reducing click-through rates on shares.
11. Serve Images via a CDN
A Content Delivery Network (CDN) serves images from edge servers geographically close to the user. For globally distributed audiences, a CDN can reduce image load time by 50-200ms per image by eliminating the round-trip latency to your origin server.
CDNs also enable automatic format conversion: services like Cloudflare Images, Cloudinary, and ImageKit can automatically serve WebP to browsers that support it and JPEG as a fallback, without requiring you to store multiple versions of each image.
For international SEO, a CDN is particularly important. Without one, users far from your origin server experience significantly slower page loads, which can affect both rankings and conversion rates in those markets.
12. Optimize the Surrounding Page Context
Google does not evaluate images in isolation. It combines alt text, file name, surrounding text, captions, heading context, and the overall topic of the page to understand what an image shows and what search queries it should match. The Mozilla Developer Network (developer.mozilla.org) describes this as the “contextual relevance” model: an image about a product placed in the middle of an unrelated article sends a weaker relevance signal than the same image placed next to a description of that product.
Best practices for optimizing page context around images:
Place images near topically relevant text: if you have an image of a compressed WebP file, place it adjacent to the paragraph that describes WebP compression. Do not bury it at the bottom of the article near unrelated content.
Write descriptive captions: captions are one of the first text elements readers notice on a page. They are read more often than body text. Google reads captions as context for what an image shows. Keep captions factual and descriptive (3-10 words or one short sentence), not keyword-heavy.
Match headings to image content: an image optimized for “WebP compression comparison” should appear under a heading about WebP compression or image formats. Do not place it under a heading about alt text or sitemaps. Heading-to-image alignment is a strong relevance signal.
Use consistent image URLs: if the same image appears on multiple pages, reference it from the same URL each time. Google caches images by URL, and consistent URLs allow Google to reuse the cached version without re-downloading. Inconsistent URLs (e.g., different CDN paths for the same image) force redundant downloads and can split the image’s ranking signal across multiple URLs.
Link context also matters: if another site links to your page from an anchor like “best practices for image SEO,” Google associates that anchor text with the page’s topic, including its images. Building topically relevant external links to your most important image-optimized pages reinforces the ranking signals for those images.
Image Optimization and Core Web Vitals: Reducing LCP and CLS
Core Web Vitals is Google’s framework for measuring page experience. Two of the three metrics (LCP and CLS) are directly affected by how images are handled.
Reducing LCP with Image Optimization
Largest Contentful Paint measures the time from navigation start to when the largest visible element renders. On most content pages, the largest element is a hero image, a banner, or a featured image.
To improve LCP through images:
- Use WebP or AVIF to reduce file size and download time
- Add a preload link in the document head for the LCP image
- Set fetchpriority=”high” on the LCP img element itself
- Ensure the LCP image is NOT lazy-loaded (loading=”lazy” delays LCP)
- Compress the LCP image aggressively. Even 20KB saved here can improve LCP by 100-200ms
- Consider inlining a low-quality image placeholder (LQIP) for instant visual feedback
For pages where the LCP element is a CSS background image, convert it to an HTML img element. CSS background images cannot be preloaded with the link preload hint, limiting your ability to optimize LCP.
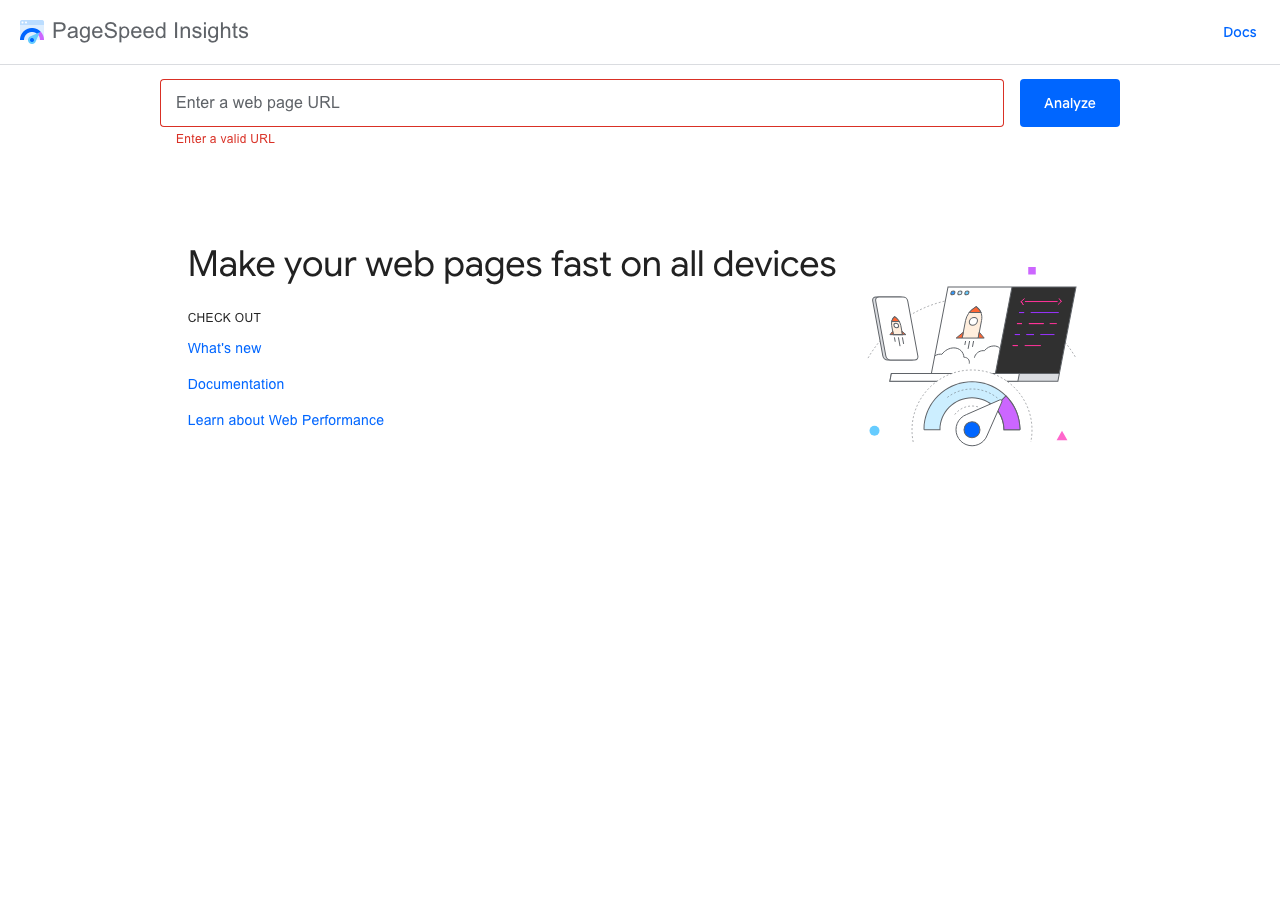
Measure your current LCP with PageSpeed Insights at pagespeed.web.dev. The tool shows which element is your LCP and provides specific recommendations.
Preventing CLS by Specifying Image Dimensions
Cumulative Layout Shift measures how much visible content unexpectedly shifts as the page loads. Images without specified dimensions are one of the most common causes of CLS.
When the browser encounters an img tag without width and height attributes, it does not know how much space to reserve in the layout. When the image finally loads, the browser inserts it and pushes all the content below it downward. This creates a visible shift that is disruptive to users and penalized by CLS scoring.
The fix is simple: always specify both width and height attributes on every img element. The browser uses these values to calculate the aspect ratio and reserve the correct space before the image loads, eliminating the layout shift. You can still use CSS to make the image responsive (max-width: 100%; height: auto;). The browser handles scaling correctly once the space is reserved.
Good CLS target: under 0.1. Most image-related CLS issues can be resolved entirely by adding width and height attributes.
Optimizing Images for Google Lens and Visual Search
Google Lens processes over 12 billion visual searches per month, according to data Google shared at Google I/O. Users photograph products they want to buy, plants they cannot identify, dishes they want to recreate, fashion items they want to find, and text they want to translate. Google matches those photographs against indexed images across the web.
Most SEO professionals are not optimizing for Lens at all, which makes it an underserved opportunity. The optimization requirements overlap significantly with standard image SEO but have a few additional considerations.
What influences visibility in Google Lens:
- Image resolution and clarity: Lens works on visual pattern matching. Blurry, low-contrast, or heavily compressed images are harder to match against user photographs. High-resolution images (at least 1200px on the longest side) with good lighting and clear subject matter match more reliably.
- Product schema markup: for product images, structured data with accurate product names, SKUs, prices, and availability dramatically improves Lens’s ability to surface your images in shopping-related queries. Google explicitly uses schema markup for Lens product identification.
- Accurate alt text: Lens combines visual analysis with text metadata. Describing the subject accurately in alt text helps Google connect visual queries to the right page.
- Canonical image URLs: if the same product image appears on multiple pages or URLs (common on ecommerce sites with category filters), use canonical tags to point to the preferred page. Images indexed at too many competing URLs may not rank well in any of them.
- Mobile image quality: the majority of Lens queries originate from smartphones pointed at real-world objects. Images that display sharply on mobile, not just desktop, are more likely to be recognized as matches.
For ecommerce, Google Lens is a high-intent channel. A user photographing a product on a store shelf is explicitly asking “where can I buy this?” Appearing in that Lens result is a direct path to a purchase. Product images with accurate schema markup, descriptive alt text, and high resolution are best positioned to capture this intent.
For content sites, Lens can surface infographics, charts, and screenshots when users photograph similar topics. Adding a subtle watermark or domain label to your original infographics provides attribution and brand recognition even when Lens surfaces them in results outside your site.
The blog.google search blog has documented Lens as a key area of investment, with features like “Search your screen” and shopping integration expanding Lens’s role in the search ecosystem. Treating Lens optimization as a distinct component of your image SEO strategy positions your site ahead of competitors who are still focused solely on traditional image search.
Image SEO Checklist: How to Audit Your Site’s Images
Use this checklist before publishing new pages and periodically for site-wide audits.
Pre-Publish Image SEO Checklist
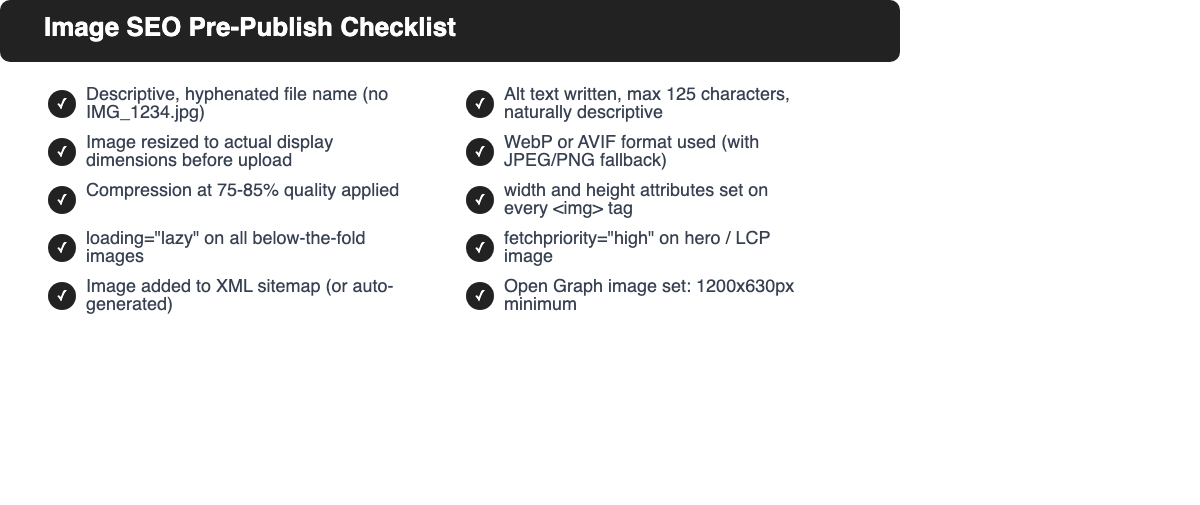
Before publishing any page with images, verify:
- File names are descriptive and keyword-relevant (no IMG_0001.jpg)
- All images have alt text (max 125 characters, no keyword stuffing)
- Images are resized to their actual display dimensions
- Images are compressed (under 100 KB for standard images, under 200 KB for hero images)
- Image format is appropriate (WebP or AVIF preferred for photos; SVG for icons/logos)
- Width and height attributes are specified on every img element
- Hero/LCP image does NOT have loading=”lazy”
- fetchpriority=”high” is set on the LCP image
- All other below-fold images have loading=”lazy”
- og:image meta tag is set with correct dimensions (1200x630px minimum)
- No SEO-critical images are using CSS background-image (use img instead)
Site-Wide Image Audit
Run these checks periodically to catch image SEO issues across your entire site:
- Google Search Console Coverage report: check for images blocked by robots.txt or noindex; review the Images section under Index Coverage
- PageSpeed Insights (pagespeed.web.dev): run on your key landing pages to identify LCP issues, oversized images, and missing next-gen format usage
- Missing alt text scan: use a crawler (Screaming Frog free tier, Sitebulb, or a browser extension) to find all images with empty or missing alt attributes
- Image sitemap check: verify your image sitemap is submitted in GSC and includes your key product or content images
- CLS audit: use PageSpeed Insights or Lighthouse to identify CLS caused by missing image dimensions
| Tool | What It Checks | Free |
|---|---|---|
| Google Search Console | Indexing, coverage, mobile usability | Yes |
| PageSpeed Insights | LCP, CLS, image optimization opportunities | Yes |
| Squoosh | Individual image compression and format conversion | Yes |
| TinyPNG | Batch compression for PNG and JPEG | Free tier |
| Screaming Frog SEO Spider | Site-wide alt text audit, missing dimensions | Free up to 500 URLs |
| ImageOptim | Lossless optimization for Mac | Yes |
| ShortPixel or Imagify | Automatic optimization for WordPress | Free tier |
Image SEO issues rarely have quick single fixes. The most effective approach is running the pre-publish checklist consistently for every new page, then doing a quarterly site-wide audit to catch any accumulated issues.
Sites that invest in image SEO consistently outperform competitors on Google Images, perform better on Core Web Vitals assessments, and load faster for users. These gains compound over time into meaningful ranking and traffic advantages.
Frequently Asked Questions About Image SEO
Does image file size affect SEO rankings?
Image file size affects SEO indirectly through page speed and Core Web Vitals. Google uses page speed as a ranking factor, and oversized images are one of the most common causes of slow load times. A large uncompressed hero image can single-handedly push your LCP score into the “poor” range (over 4 seconds), directly impacting rankings. Compress images to under 100 KB for standard content images and under 200 KB for hero images.
Are WebP images better for SEO than JPEG?
WebP images are generally better for SEO than JPEG because they are 25-35% smaller at comparable visual quality, which improves page load speed and LCP scores. WebP is supported by over 96% of browsers. For the remaining browsers, use the picture element to serve JPEG as a fallback. If AVIF is available in your workflow, it offers even better compression (up to 50% smaller than JPEG) with 90%+ browser support.
How many images should an article have for SEO?
There is no fixed number. Articles should use images where they add value: to illustrate a process, compare options, show a screenshot, or break up long text. Informational how-to guides benefit from step-by-step screenshots or diagrams. Comparison articles benefit from a visual comparison table or side-by-side screenshots. Avoid using filler stock photos that add no informational value. These increase page load time without helping the reader or SEO relevance.
Do alt text and image file names still matter for SEO in 2026?
Yes. Google’s image ranking documentation confirms that alt text and file names are used alongside computer vision to understand image content. Computer vision has improved significantly but it works alongside text signals, not instead of them. A well-described image with accurate alt text, a descriptive file name, and relevant surrounding text consistently outperforms an identical image with empty alt text and a generic file name.